
How do I program my instrument or interface to make sound?
Think About
How can I make sound with a microcontroller?
What do I want my instrument to do?
Get Started
- Download the following Arduino file called music_output
The music_output file is called a sketch.
A sketch is an Arduino program that you use to program your microcontroller. The music_output sketch looks like this:
When you open the music_output sketch, it looks like this:
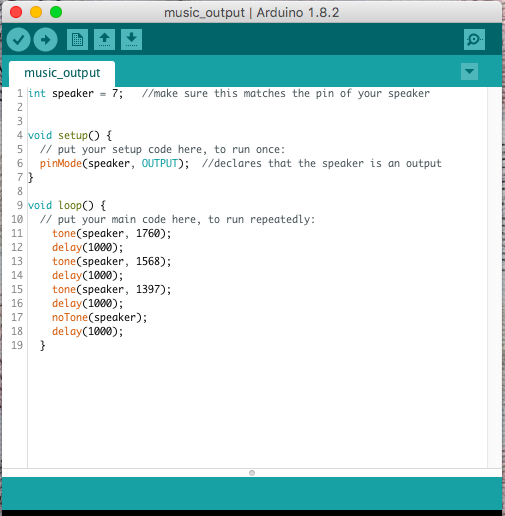
We’ll talk more about the sketch and how it works in the next part, but for now, let’s send this sketch to your microcontroller.
- Plug your microcontroller into your computer’s USB port. (We did this in the last XP. Refer back to it for photo)
Go Further
Watch the following video to learn how to program a microcontroller to make sound. Directions are also available below in text:
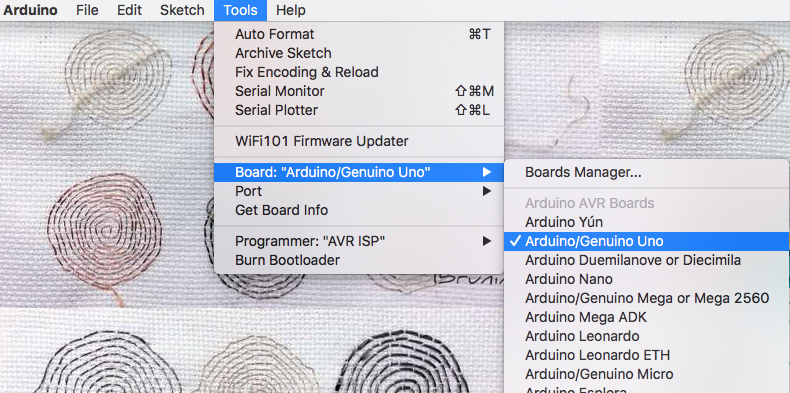
- Go to the tools menu at the top of your screen to select the Arduino board you’re using. I’m using an Arduino Uno, so that’s what you’ll see in these images.
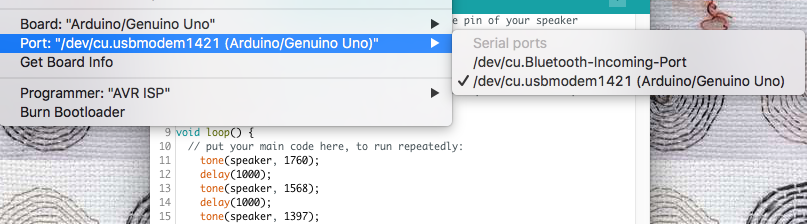
- Go to tools menu again to select the port you’re using. See the image below:
- On a Mac, your will choose a port that has usb in the name. The port name won’t be the same as in this image.
- On a Windows computer, your port will be COM followed by a number.
- At the top of your sketch, click on the arrow to upload (or send) the code to the microcontroller:
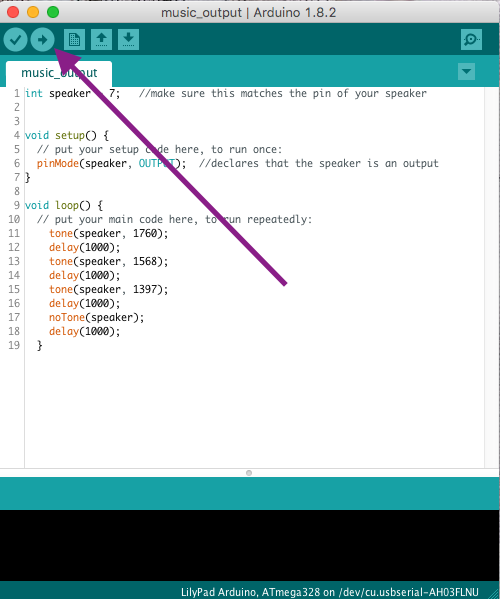
You should hear a three note melody.
Do you hear it?
If you don’t hear anything, check your wiring and make sure your circuit is set up correctly.
Is the red wire or positive side of the piezo buzzer connected to pin 7?
[NOTE: If you receive an error message please, have your teacher either take a screen shot or copy and paste the error message and send it to the playtest coordinator]
If you hear the melody, you programmed your microcontroller to make sound!
Share What You Learned
Upload a photo or short video of your Arduino making sound.